The Amazon Firestick is a fantastic device that transforms any standard TV into a smart TV, providing access to a plethora of streaming services like Netflix, Hulu, Amazon Prime, and more. Setting up your Firestick can seem daunting at first, but this comprehensive guide will walk you through the process step-by-step. Follow along to get your Firestick up and running in no time!
Step 1: Unbox Your Amazon Firestick
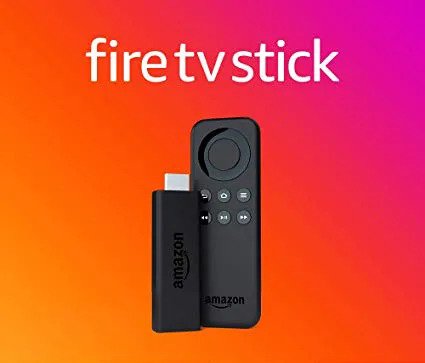
When you receive your Amazon Firestick, you should have the following items in the box:
- Amazon Firestick
- Remote control
- Two AAA batteries
- USB power cable
- Power adapter
- HDMI extender
- Quick start guide
Ensure all these items are present before proceeding to the next step.
Step 2: Connect the Firestick to Your TV
- Plug the Firestick into an HDMI port: Locate an available HDMI port on your TV and plug the Firestick into it. If your TV’s HDMI ports are hard to reach, use the HDMI extender provided in the box.
- Power the Firestick: Connect the USB power cable to the Firestick and plug the other end into the power adapter. Plug the power adapter into a wall outlet. Alternatively, you can power the Firestick directly from a USB port on your TV if it provides enough power, but using the wall outlet is recommended for the best performance.
Step 3: Set Up the Remote Control
- Insert the batteries: Open the back of the remote control and insert the two AAA batteries included in the package.
- Pair the remote: The remote should automatically pair with the Firestick. If it doesn’t, press and hold the Home button on the remote for about 10 seconds to initiate the pairing process.
Step 4: Power On and Configure
- Turn on your TV: Switch to the HDMI input channel that you connected the Firestick to.
- Initial setup: You should see the Firestick loading screen. Follow the on-screen instructions to set up your Firestick. This will include connecting to your Wi-Fi network, signing in to your Amazon account, and setting up any parental controls if needed.
Step 5: Customize Your Firestick
- Install Apps: Navigate to the Apps section to download and install your favorite streaming services like Netflix, Hulu, Disney+, and others.
- Personalize Settings: Go to Settings to customize your preferences, such as screen resolution, audio settings, and accessibility features.
Step 6: Start Streaming
Once everything is set up, you can start exploring the vast array of content available on your Amazon Firestick. Use the voice search feature on your remote to quickly find shows, movies, and apps.
Troubleshooting Common Issues
If you encounter any problems during setup, here are a few quick tips:
- No signal on TV: Ensure the Firestick is securely connected to the HDMI port and the correct input source is selected on your TV.
- Remote not pairing: Hold the Home button for 10 seconds to reinitiate pairing. Check the batteries to ensure they are inserted correctly and have enough charge.
- Wi-Fi connection issues: Make sure you are entering the correct Wi-Fi password. Try moving the Firestick closer to your router or using a Wi-Fi extender if the signal is weak.
Conclusion
Setting up an Amazon Firestick is a straightforward process that can be completed in just a few minutes. By following this guide, you’ll be ready to enjoy all your favorite streaming content on your TV. For more tips and tricks on maximizing your Firestick experience, check out our comprehensive guide to Amazon Firestick.
FAQs
1. Can I use the Firestick on any TV?
Yes, as long as the TV has an HDMI port.
2. Do I need an Amazon Prime membership to use the Firestick?
No, but having a Prime membership provides access to additional content and features.
3. How do I reset my Firestick?
Go to Settings > My Fire TV > Reset to Factory Defaults.
For more detailed instructions, visit our Amazon Firestick support page.
Backlinks for Additional Help
- Amazon Firestick Official Setup Guide
- Troubleshooting Firestick Issues
- Best Apps for Amazon Firestick
By following these steps and tips, you’ll have your Amazon FireStick set up and ready to go in no time. Happy streaming!
Related posts
How to Setup IPTV on Firestick?
A complete tutorial on how to setup Amazon Firestick IPTV.